

Sometimes we like to apply special formatting or see how a bit of code looks on our WordPress blog. Without installing anything on the computer, additions and changes made to the PHP files can only be tested on our webhost where they have the programs installed to read them. It’s quite a hassle and not an ideal way. Installing XAMPP, a free and and open source web server, takes away that hassle.
In the past, we have put off installing a web server to run WordPress on our computer because it looked like you need a lot of technical know-how. It’s really not as technical as it appears, especially when the people at apachefriends.org do all the work with their XAMPP software. Having said that, it does take a bit of patience: there are quite a lot of little simple steps you need to do that adds up to quite a lot of steps. Below is an outline of what’s needed to be done:
- Download and install XAMPP
- Set up WordPress on your computer
- Download a copy of the WordPress database
- Download/Install your WordPress blog files
- Note MySQL settings from your blog’s wp_config.php file
- Create and import the downloaded WordPress database
- Create a user for the database
- Connect the created user to the database
- Redefine site address of your blog
- Add password to root user and XAMPP directory
Installing XAMPP is simple and straightforward using the program’s wizard. Much of the work is in the setting up of WordPress on the computer, which is similar to what you need to do to run a WordPress blog on your site on the world wide web; so it’s all very familiar and shouldn’t be too much of a headache. The last part is securing the root user (which is not protected by a password) and the XAMPP htdoc directory, which isn’t all that difficult to do either. Looking at it like that, then, there are only three things to do, and all up, takes around eight, nine steps for your existing blog to be up and running. This can all be set up in 30 minutes, may be less! Not very daunting at all!
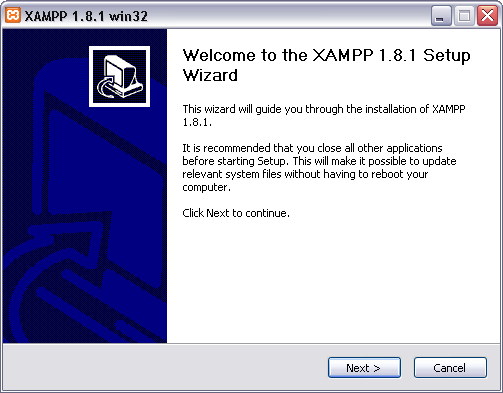
Over three posts, we’ll try to write about getting a server up and running as well as an existing blog onto the computer as clearly and as concisely as possible to make the reading less painful. We will begin with installing the web server XAMPP. We installed ours on a Windows machine, so the guide will be using the Windows operating system.
INSTALLING XAMPP
- Download XAMPP
- Run XAMPP executable program
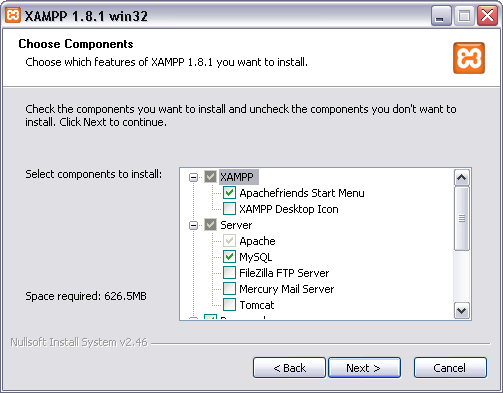
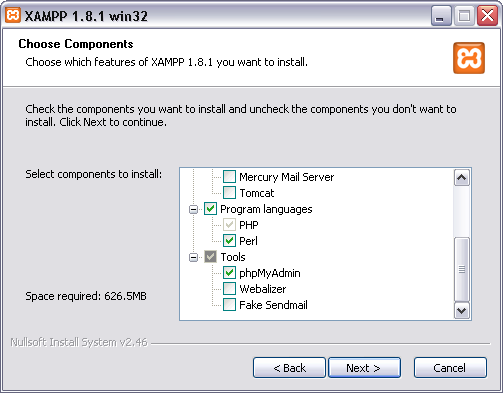
- Choose the components to install
- Apachefriends Start Menu folder
- Apache
- MySQL
- PHP
- Perl (there are no files using this language in WordPress, but never hurt to have it)
- phpMyAdmin
- Choose the destination folder for the XAMPP installation
- Click “Install”
Choose the package for your computer’s operating system. This is available at the apachefriends.org site. For Windows, choose the Installer as this is the easiest way to install the software.
Locate the directory you downloaded XAMPP and run the executable. A wizard should pop-up and guide you through the installation process.
Developers would make use of all the components. You can also install everything. For what we want to do, which is to set up a WordPress blog and be able to view the changes made to the PHP files, we’ve chosen only to install a selection of components to save space—namely:
You can leave it as the default directory: C:\xampp\. This is recommended by Apachefriends.org if we recall correctly.

That’s it. Now, wait for the installation to complete.
INSTALLING XAMPP FOR MAC OS X
We thought we’d cover installing on a Mac as well since it is even easier than installing on a Windows machine. If you have Mac OS X, it’s as simple as downloading the software then dragging and dropping it into the Applications folder! Makes us wonder if we should have just gone and installed XAMPP on the Mac in the first place!
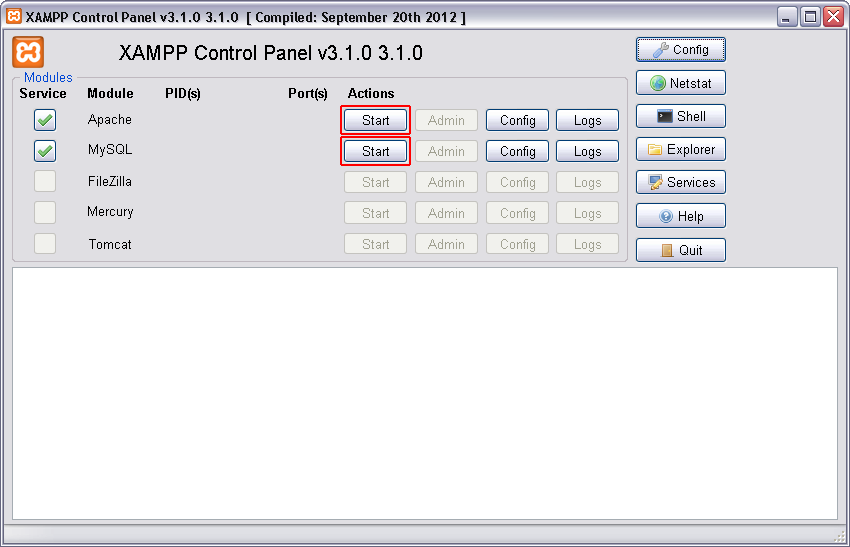
RUNNING APACHE AND MYSQL MODULES
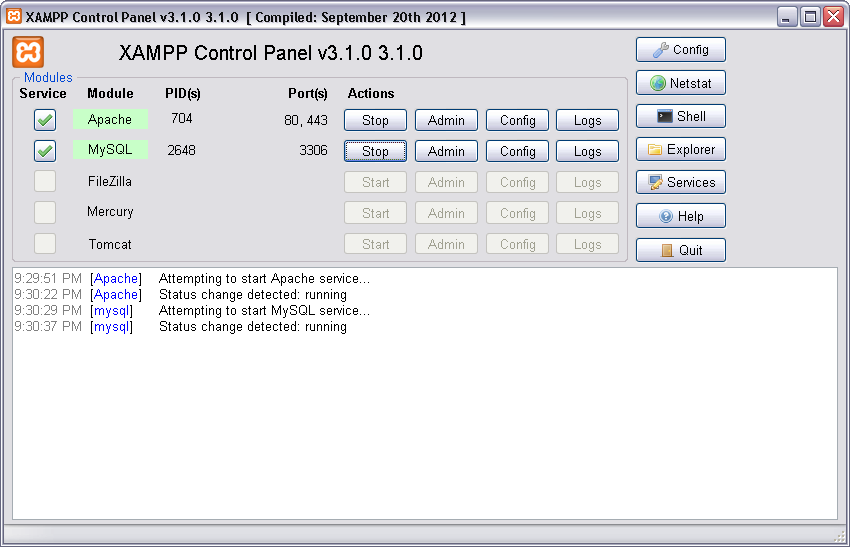
- Open XAMPP control panel
- Click the “Start” button for both Apache and MySQL modules
After the installation is complete, a dialog box will ask you if you wish to open XAMPP control panel. Click “Yes”. If you accidentally clicked “No”, you can find it in the XAMPP directory: “C:\xampp\”. Double-click “xampp-control.exe”.
TEST TO SEE IF WEB SERVER IS WORKING
- Open your Internet browser
- Type “http://localhost/” in the address bar
If it is working, you should see the XAMPP splash screen. It may be in German. You can change the language by clicking the desired language listed on the screen.
VIEWING YOUR PHP/PERL FILES
To load and view your files, they need to be stored in the htdocs directory under the XAMPP folder: C:\xampp\htdocs for Windows. The htdocs folder is like the www\ or public_html\ directory for your website online. So, if you created a file called, test.php, you would store this file in the htdocs folder. To view this file, you would need to open your Internet browser and type in the following: “http://localhost/test.php”.
WEB SERVER, DONE!!
There you have it, that is all there is. You’ve got your own web server on your computer! In the next post to this series, we will write about setting up your existing WordPress blog on your computer.
Till next time!
ADVERTISEMENT