
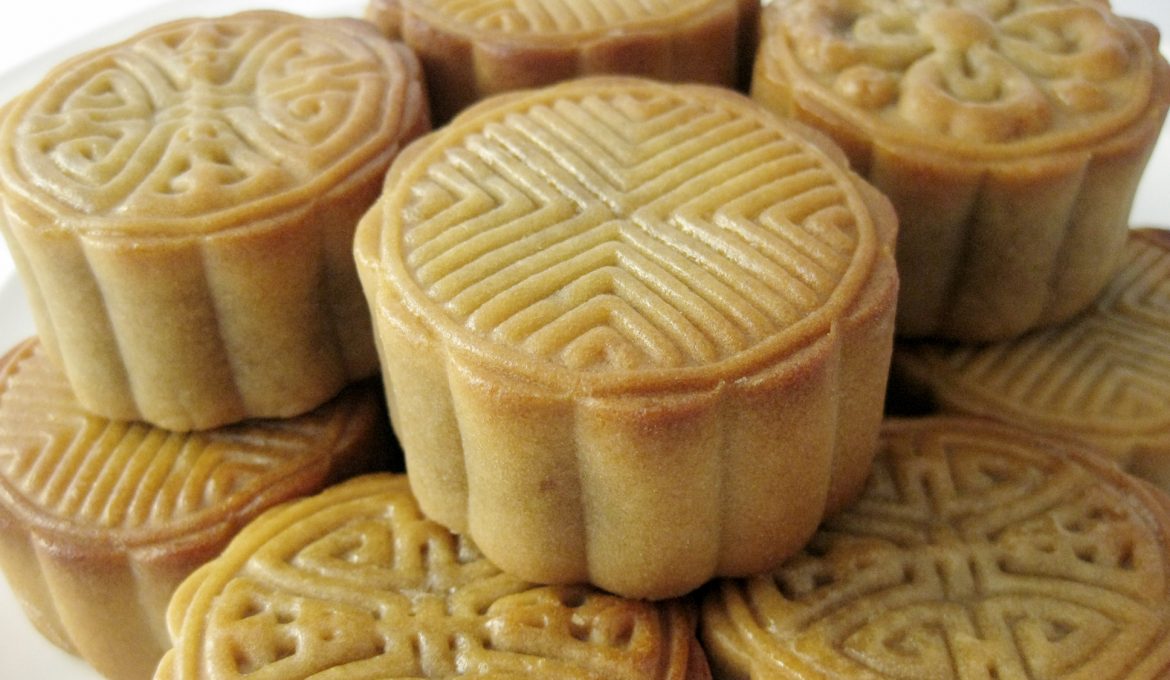
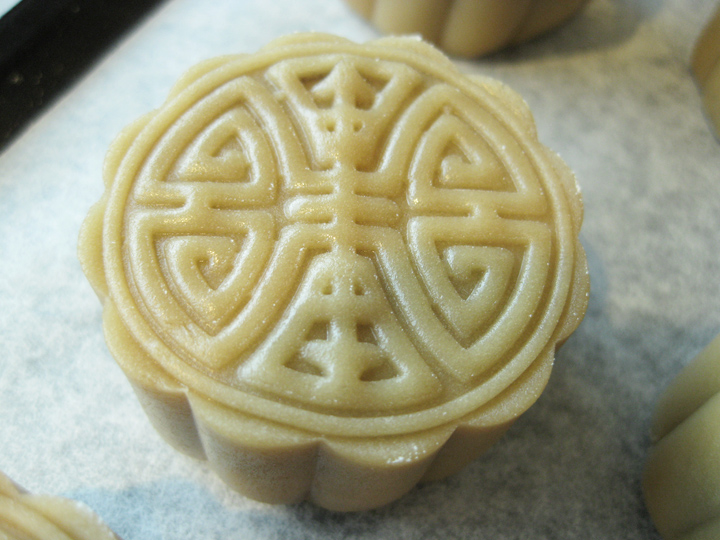
There was a time we thought mooncakes weren’t so easy to make. The few times we tried, they always came out looking wrong. The colour was pale. It didn’t have that nice golden brown skin with just that tiny bit of sheen on it. The pattern always lost its definition and the shape expanded outwards. The most disappointing is they never had that soft, thin, tender crust. The crust always came out hard.
When you fail, just keep trying—or in our case, keep searching until we found the reason why every time our mooncakes came out that way. It was a pretty simple reason: we didn’t let the mooncake mature. Mooncakes require time to soften up and develop the golden brown color which is helped by absorbing the oils in the filling and the kansui (also known as lye water, or potassium carbonate and sodium bicarbonate).
Mid-Autumn Festival is the time we normally enjoy mooncakes. Every year it’s observed on the August 15th on the lunar calendar—that would be October 4th for this year—so it’s still a little while away. But, we thought, why not post a blog about homemade mooncakes a little early. That would give plenty of time for anyone who thought about making mooncakes, but have yet to try, plenty of time to hone the skills ready to impress family and friends by the time Mid-Autumn Festival rolls around!
It really isn’t actually that hard to make the traditional red bean mooncake after all. It just takes a bit time. The recipe we chose to adapt a recipe from blogger, happyhomebaking.
The original recipe makes about 11 50g mooncakes. They’re pretty small, and with just 11, they get eaten pretty quickly, so we decided to double the recipe in order to have enough to eat as well as give away.
The Recipe – Red Bean Mooncakes
Ingredients
Makes 22
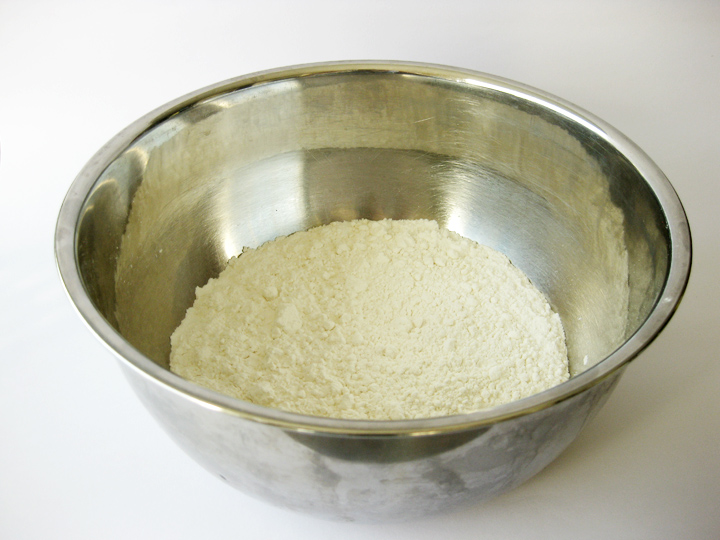
- 200g flour
- 140g golden syrup
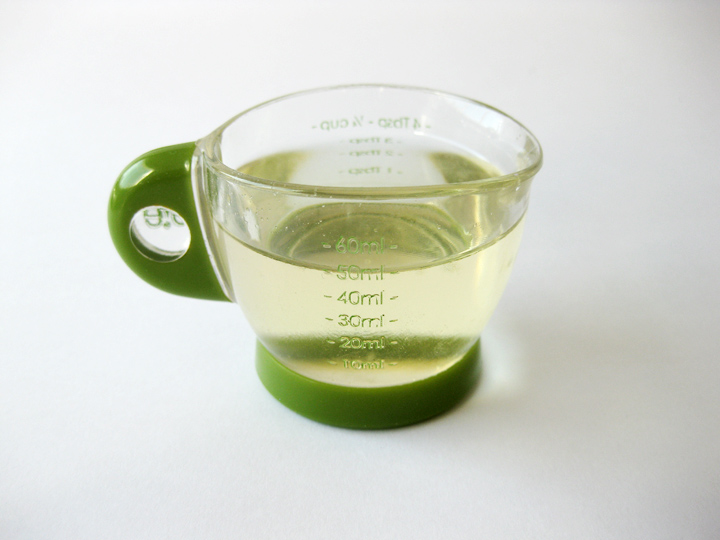
- 4ml kansui
- 50ml oil
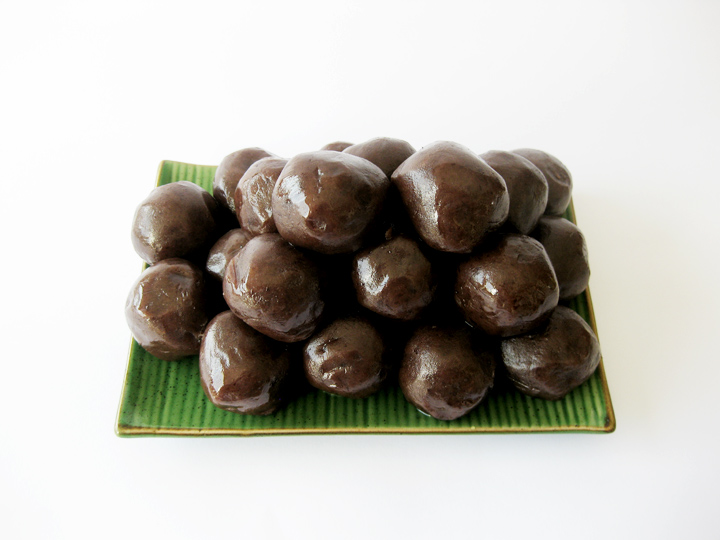
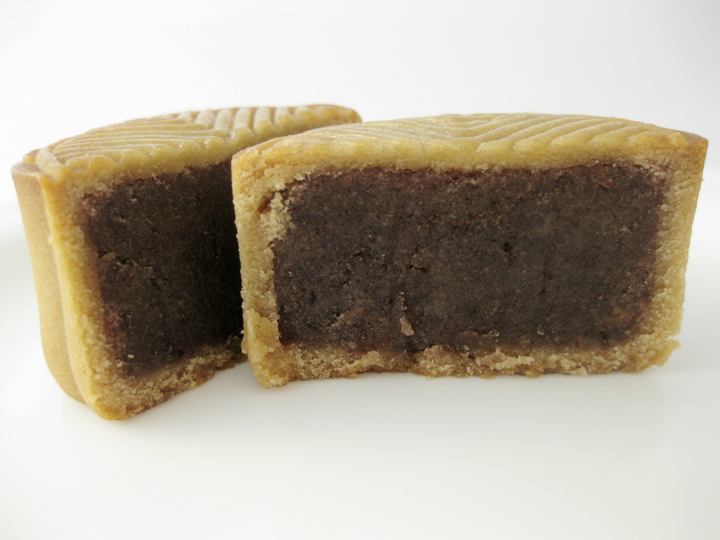
- About 730g red bean paste
- Beaten egg to glaze top of mooncakes


What is Kansui?
Kansui is food grade lye water (potassium carbonate and sodium bicarbonate solution). The use of kansui we believe gives the skin that chewy tender texture as well as the brown colour.
Where to find Kansui and Red Bean Paste
You can find kansui at a Chinese grocery store. Similarly, red bean paste can also be bought already-made at a Chinese grocery store. We made our own red bean paste.
Mooncake Mould Used
We used a mechanical mooncake mould. It’s much easier and quieter than the traditional wooden ones.
Directions:
Make the mooncake skin
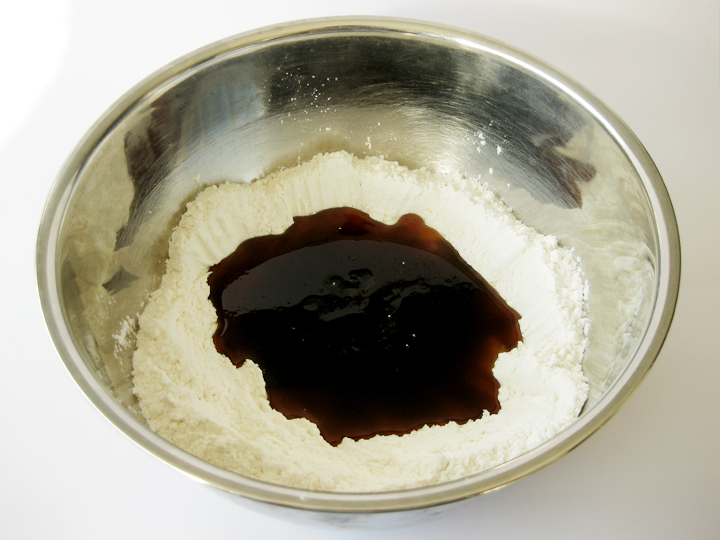
- Mix golden syrup and oil together till combined in a small bowl.
- Add kansui to the golden syrup-oil mixture. Mix till combined.
- Place flour in a medium bowl and make a well in the centre.
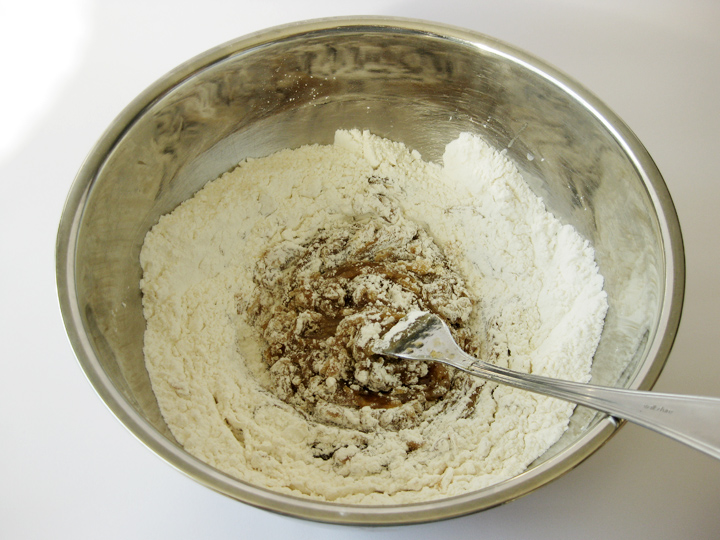
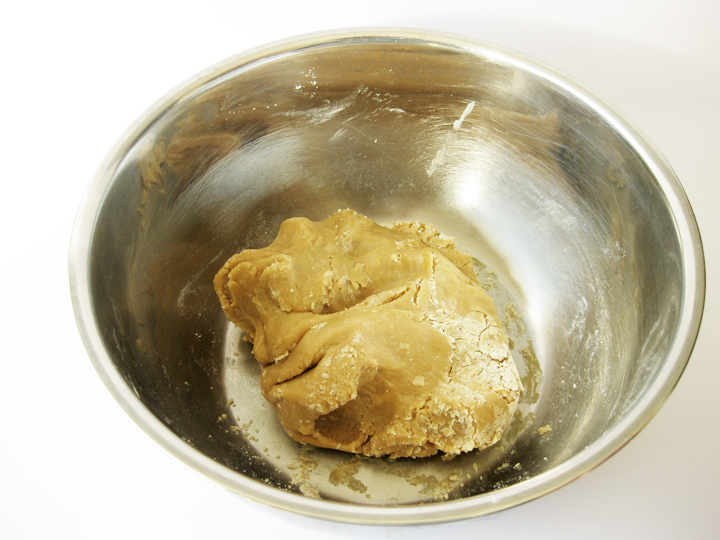
- Pour in the golden syrup mixture. Mix till everything is combined and forms a dough.
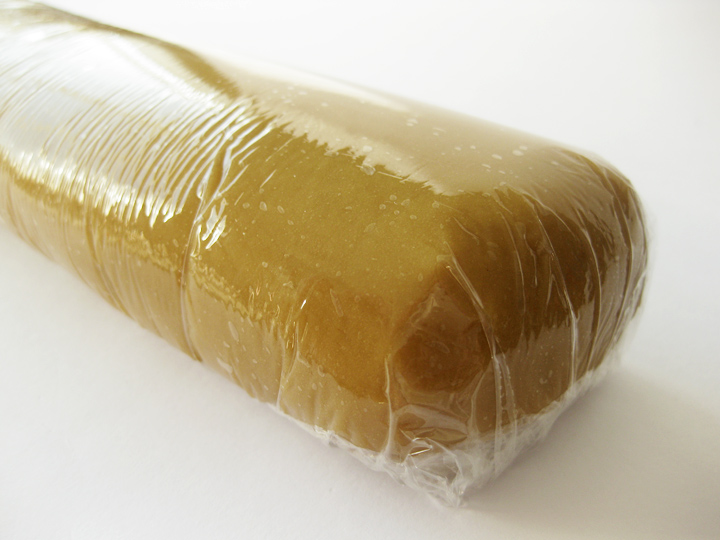
- Wrap dough in cling film and refrigerate for at least 2 hours.
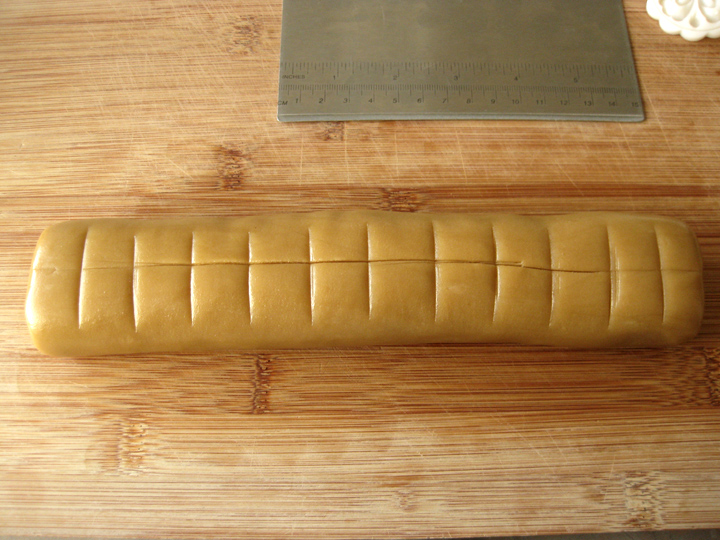
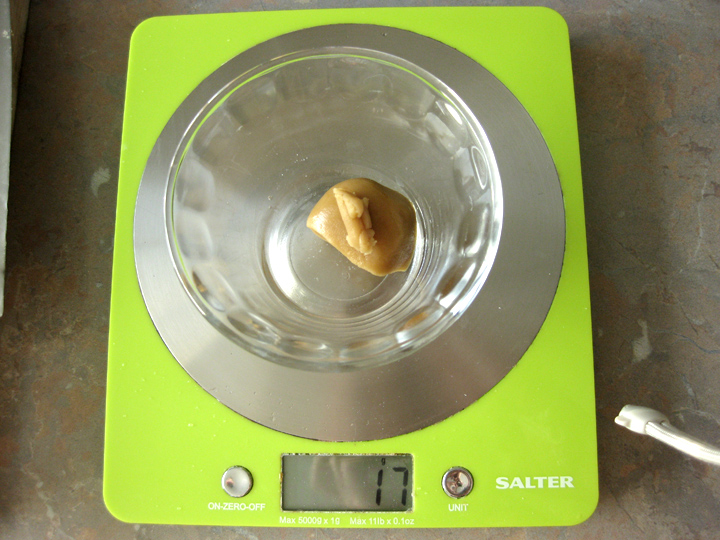
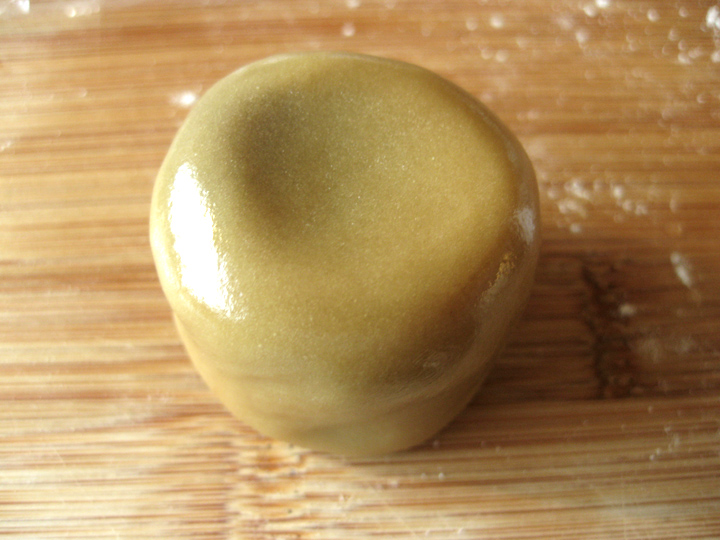
- After refrigeration, divide dough into 22 pieces, each weighing 17g, and roll each piece into a ball.
- Divide red bean paste into 22 balls, each weighing 33g. Cover and set aside in the fridge.
Preheat the oven to 160°C.
Our oven is a fan-forced convection oven. For a conventional oven bake 20°C higher.
Make the mooncakes
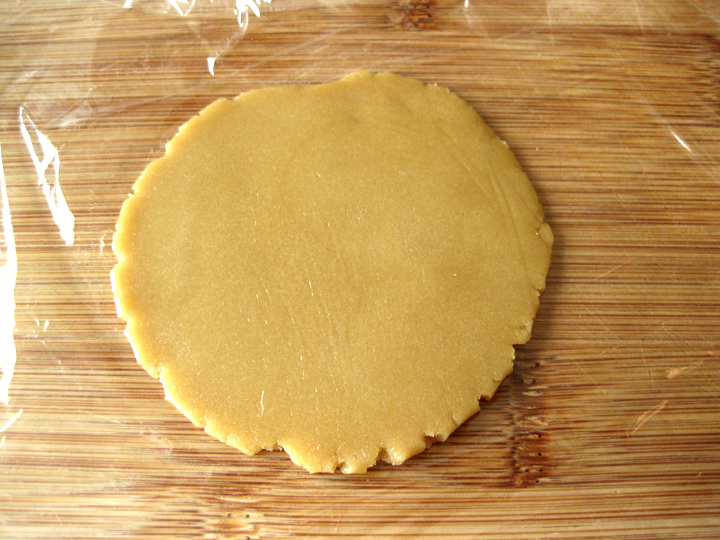
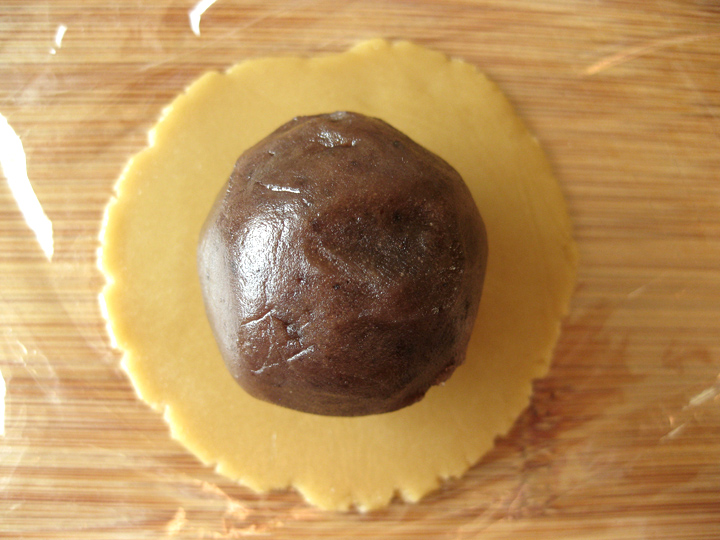
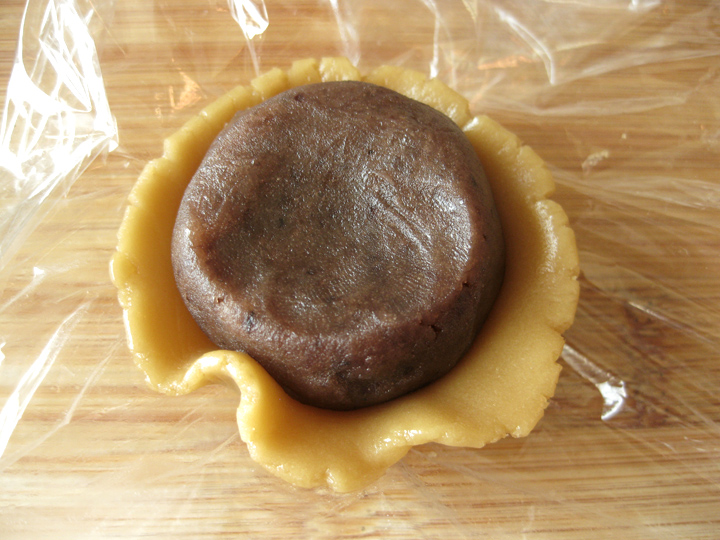
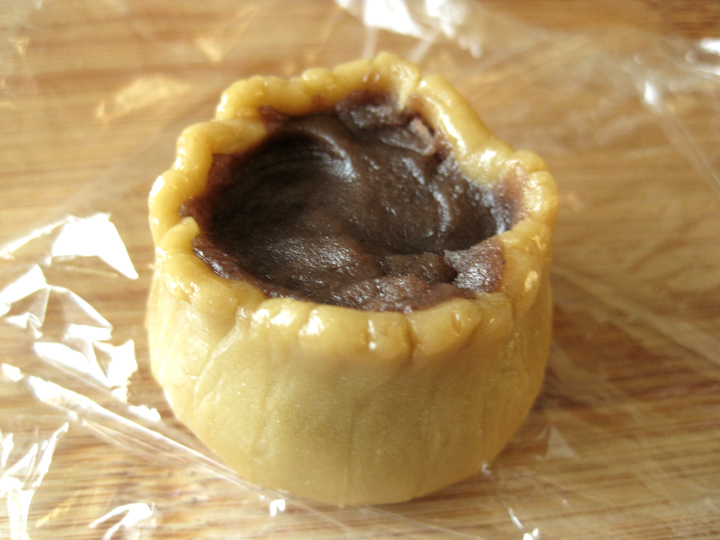
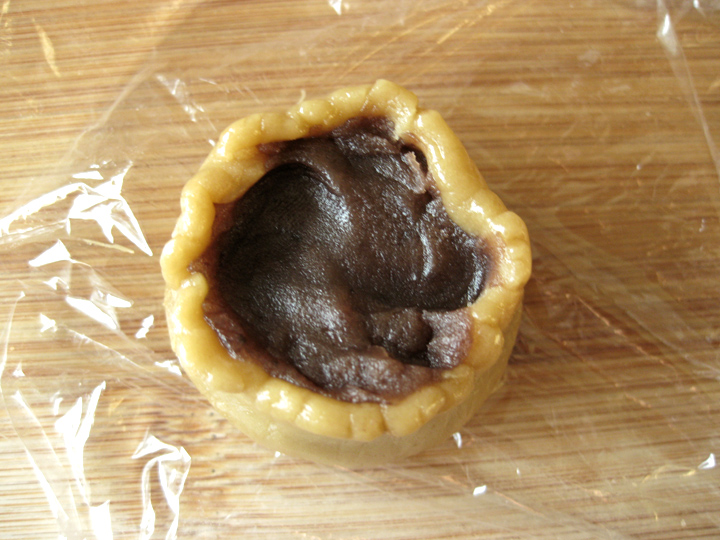
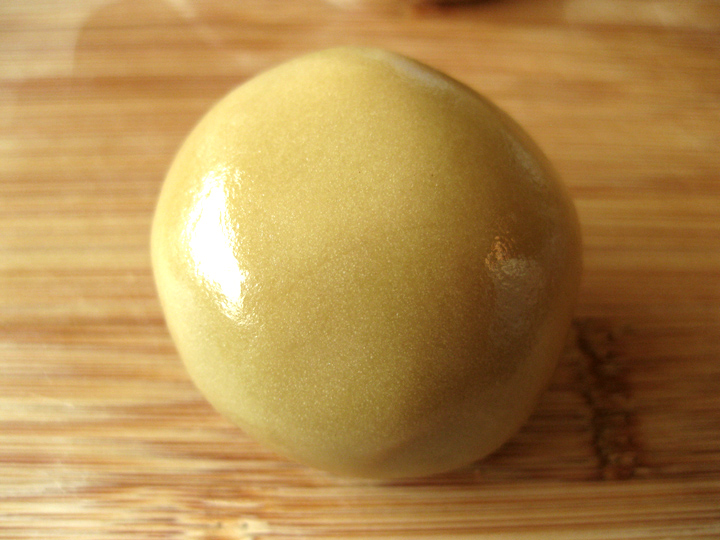
- Flatten each ball of mooncake skin dough into a disk then place a ball of red bean paste inside a disk of mooncake skin.
- Encase the red bean paste with the mooncake skin by slowly sliding the dough upwards and pressing the red bean paste inwards around the edges to begin wrapping all the red bean paste inside.
TIP: To make the disk of mooncake skin, place the dough between two layers of cling film and flatten with something flat, e.g. a dough divider. Using cling film will avoid dough sticking to the surface the dough is being flattened/rolled.
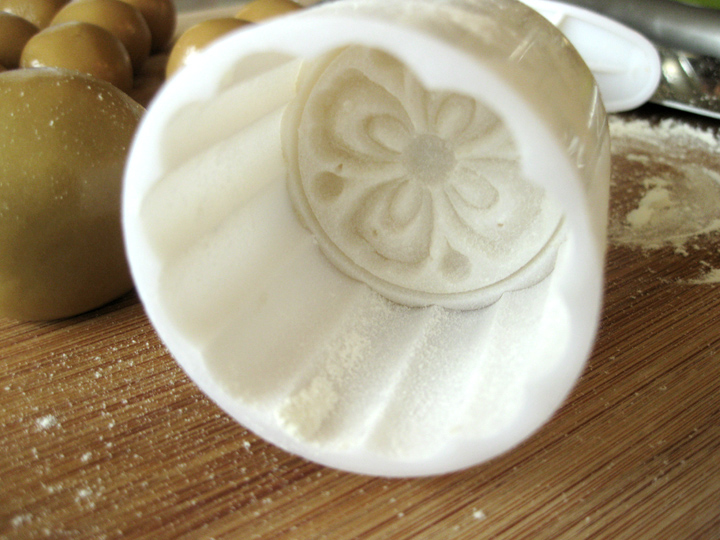

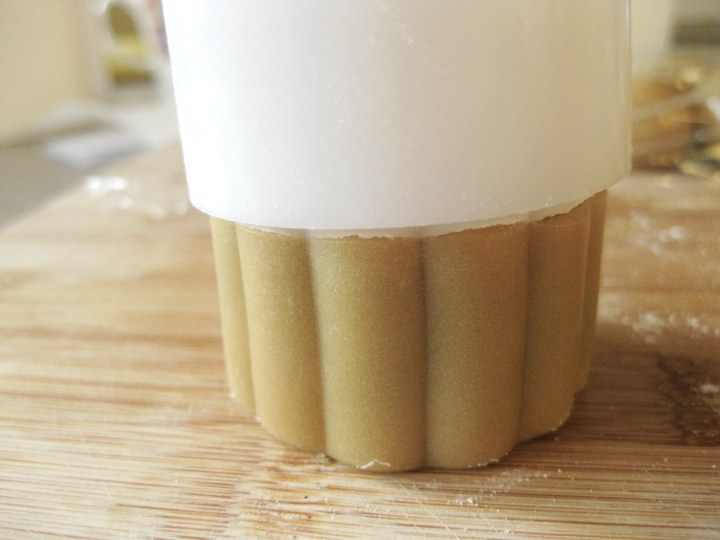
- Very lightly flour the mooncake mould and tap to rid excess flour.
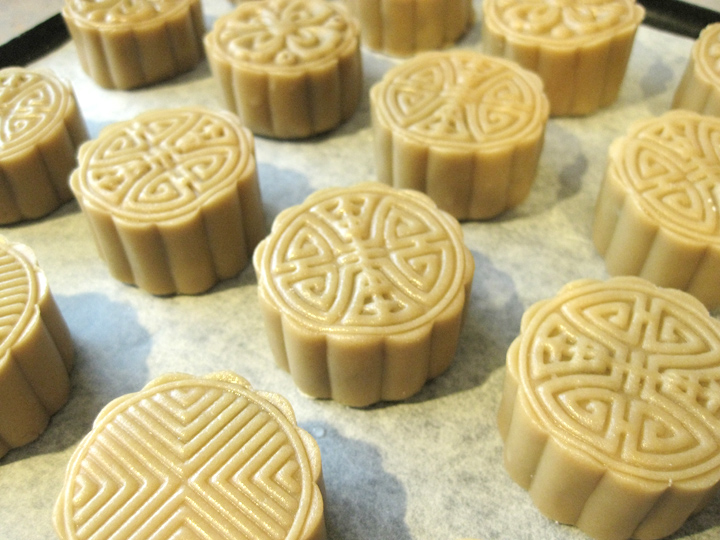
- Place the mould over the ball. With one hand, keep the mould pressed down while the other hand presses down the lever. Then to remove mooncake from mould, lift the lever.
- Repeat the steps for the rest of the dough and red bean paste.
Bake and egg-wash the mooncakes
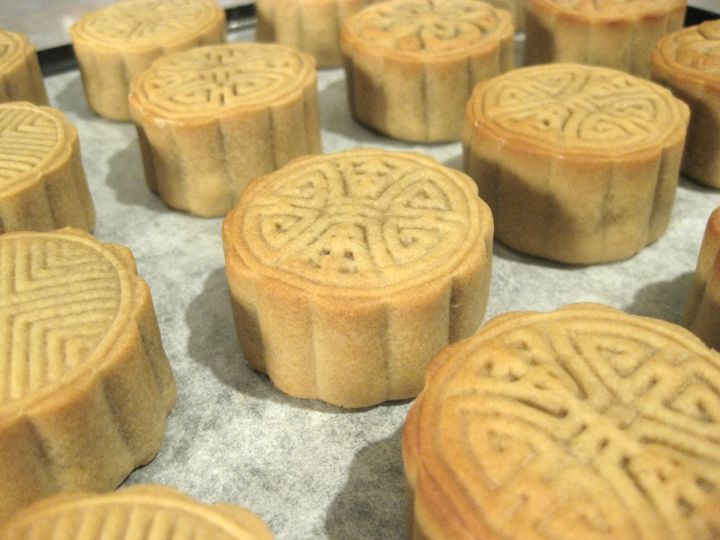
- Place the mooncakes on an oven tray and bake for 10 minutes.
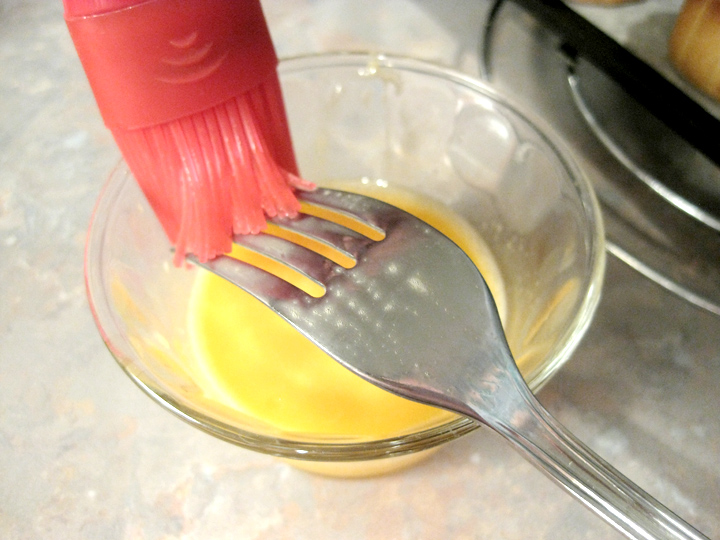
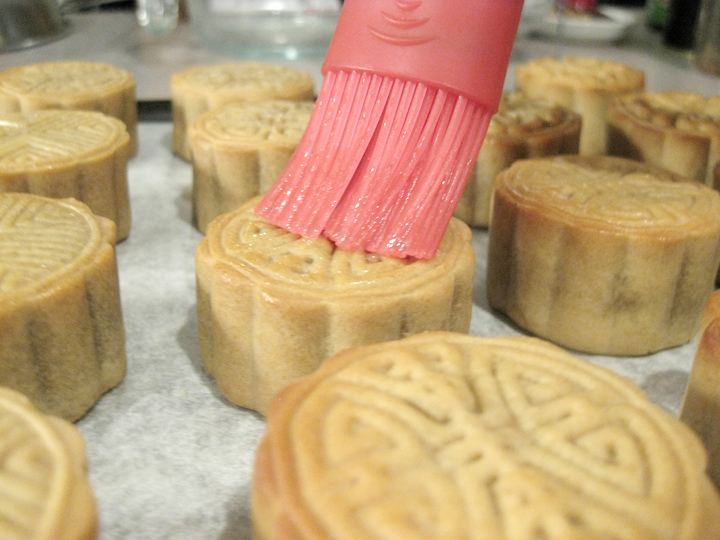
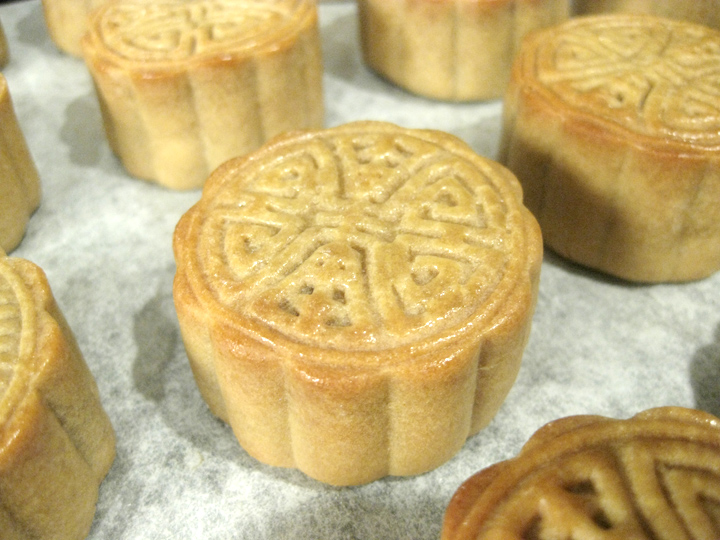
- Remove from oven and allow mooncakes to cool before adding a very thin layer of beaten egg to just the top of the mooncakes. This will give the mooncakes a subtle sheen.
- Return to oven and bake for a final 5 minutes.
NOTE: The amount of egg needed to glaze the mooncake is very little, so if you happen to be frying an egg or making an omelette as well as thinking of making mooncakes, save about 1 – 2 tablespoon for the mooncakes. Of course, you could also just crack a whole egg and then use the rest to fry an egg or make an omelette. : oP :
oP.
TIP: Don’t put too much as it’ll the egg will just pool on the top of the mooncake and it won’t look too nice. We like to dip a fork into the beaten egg then swipe the brush across it so that we don’t pick up too much. We add about two or three thin layers.
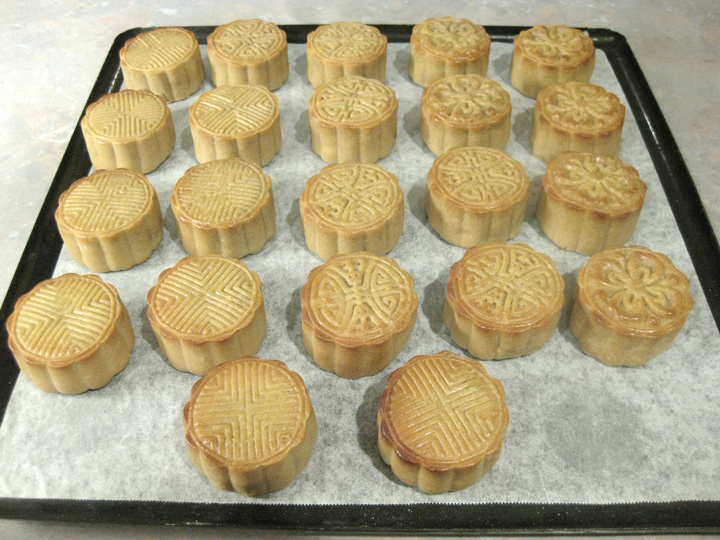
Remove from oven, allow to cool before storing in an airtight container.

Leave mooncakes in container for 1-2 days to allow oils to be absorbed into the skin.
The mooncakes can be eaten on the same day, but the skin/crust will be hard. To get that soft tender mooncake skin, mooncakes need to mature for a short time. The oilier the filling used the less time the mooncakes needs to mature.
Enjoy!
ADVERTISEMENT